Contents
Aeropress single-handedly took over many brewing methods with its easy to brew and carry coffee maker. Not surprisingly, This brand is the best Aeropress coffee maker named after this coffee presser which happens to be an invention of recent times. Apart from that, the ease of maintaining the brew consistency and its cheap price along with its versatility has uplifted the popularity exponentially.
About Aero Coffee Press
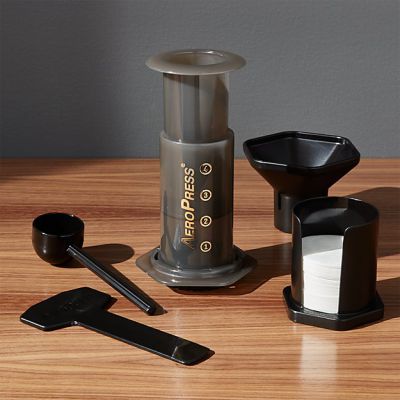
An Aeropress coffee maker is used for making the coffee equivalent to the espresso. Coffee from the Aeropress will have the fruity hints(depending upon the coffee you use). Along with that, Aeropress infuses the strength of the coffee flavors. In fact, pressurized water passing through the coffee bed quickly brewing the coffee.
Having said that, brewing a shot or two the coffee using the Aeropress can consume as little as a minute. Additionally, the lightweight body, easy to operate, precise brewing method maintaining the consistency of the brew makes Aeropress coffee maker the choice of many. In fact, this coffee maker has become of the most favorite and convenient product to carry for avid travelers, rangers, campers, etc.
Not to mention, this coffee maker has some intricacies which will be difficult to master initially. However, brewing a coffee will not be difficult after you master using the water-coffee ratios. In the same manner, washing the apparatus is comparatively simpler than using the Stovetop espresso maker Moka Pots.
Most importantly, using the Aeropress greatly eliminates the possibilities of making the coffee acidic. Some of the features and working of Aeropress coffee maker help reduce the acidity explained below.
How Does Aeropress Coffee Maker Work?
Coming to the working with the Aeropress coffee review, we would like to start with explaining the principle of its working. As the matter of fact, we may call this brewing method as espresso because of the resemblance.
Espresso is the brewing method which uses a pressurized flow of hot water through the tightly packed coffee grounds for extraction. In the same manner, the Aeropress does the same i.e. extracts coffee using the flow of hot pressurized water over coffee grounds. There! is a slight difference between the exact espresso and Aeropress and a lot of difference in their tastes.
Aeropress coffee maker is a two-step telescopic with one plunger and another being the brewing chamber. The plunger end has a slightly smaller diameter compared to the brewing chamber in order to pass inside smoothly. Whereas, the rubber visor on the perimeter of the plunger helps it create an air-tight seal.
Hence, when you push the plunger-end inside, the pressure will develop and force the infused coffee and grounds towards the filter. Thereafter, the filter does the task of separating the grounds from the infused coffee. Also, the paper filter can easily eliminate the oily extracts of the grounds from the infused coffee.
We have a solution for both kinds of people. If you want to include the coffee oil extracts in your brew then use the metal filter instead of the paper filter. On the other hand, use the paper filter to eliminate the coffee oil extracts from the brew.
Different Brewing Methods Using Aeropress Coffee Maker
Aeropress is a versatile product which brews the coffee fast compared to most coffee makers out there. Also, Aeropress coffee maker will allow you to play with the proportion of coffee to water and brew a range of differently tasting coffees(not the Aeropress latte or cappuccino). Moreover, this brewing method does not add a sour taste to the coffee.
Having said that, there are two ways of brewing the coffee using an Aeropress coffee maker. However, these methods cannot be called as different brewing methods technically. Because both the methods are one at the same with a different arrangement of the apparatus. Having said that, these methods are standard brewing and inverted coffee brewing.
You can learn to perform both the brewing methods by following the step by step guide given later in this article.
Aeropress Review
Starting with Aeropress review, there are certainly some drawbacks of using this coffee maker along with its advantages. Nevertheless, some of the drawbacks and advantages will neither drive you away or lure you to get Aeropress coffee maker. You can take some time to decide for yourself after reading these points and factors of owning the Aeropress.
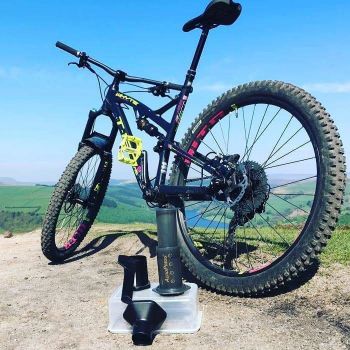
First things first, the compact body and ease of operation allow travelers to carry this along everywhere. In fact, if you can manage the cold brew then this coffee maker can even help in the jungles (with enough coffee supply). Adding to the fact, mastering the brewing process is not a big deal as long as you keep experimenting with the coffee-water proportions. Also, cleaning this tool is a child’s play once you disassemble the apparatus.
Having said that, the Aeropress coffee maker is a plastic body tool which might not have the most aesthetic appearances that you expect. Yet, its BPA free plastic material keeps the possibility of plastic poisoning away. As the matter of fact, BPA free plastic coffee maker with the food grade certifications is safe to use as a vessel for edible things.
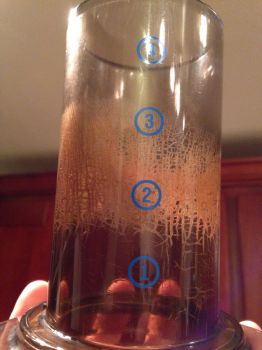
Hence, exposing this BPA free plastic material to the hot water and cold water processes will develop cracks on its walls. After a rigorous usage of this coffee maker maybe for half a year-long or 8 to 10 months, the walls will develop small cracks. However, the crack will not end up shattering the fragments but the smooth surface of the walls will deteriorate.
Additionally, the deteriorated walls will end up wearing out the rubber visor sooner than its actual life.
Apart from that, using Aeropress coffee maker will hardly require any expertise or thoroughness. The easy to brew, two-step telescopic coffee maker brewing the coffee within two minutes consistently.
On the contrary, the taste of the coffee remains hard with the fruity blend of coffee’s core. But, the taste of Aeropress coffee or Aeropress latte is far different from that of the regular espresso maker. Nonetheless, you can control the acidity of the coffee using this coffee maker unlike any other.
Overall, Aeropress coffee maker is one of the most economical coffee makers which brews a nice quality coffee. Moreover, people prefer this coffee maker for its affordable cost, ease of cleaning and mobility.
Components of the Aeropress
This section of the Aeropress coffee review sheds some light on the quality and functioning of the components. Nothing comes closer to the coffee experience because of the efficient components.
On the contrary, there are some factors about the components that we like to share.
1. Body Material of Aeropress
Aeropress plastic is made of the BPA free material. It means Aeropress plastic safe will not lead to plastic poisoning. Also, Aeropress coffee maker will last about six months before showing the signs of changes. Generally, the body of the coffee maker will develop cracks in the interior of its walls which will be visible.
Nevertheless, the cracks will not lead to shattering the plastic fragments either. As the crack will only make the surface of the walls rough and after prolonged use, it starts to break.
2. Plunger
The plunger is designed perfectly for the purpose of generating the pressure. The tightly fitting rubber visor of the plunger works efficiently for a long time. Generally, people prefer to change the visor after using for a few months to maintain efficiency.
Apart from that, the plunger will maintain a uniform pressure over the coffee-water mixture with its flat head. Hence, the plunger is a rugged component meant for outlasting the Aeropress coffee maker itself.
3. Filter Cap
The filter cap is made of similar material with small holes to allow filtration. In addition to that, you will have to use either the paper microfilters or the metal ones.
- Paper Filter
The paper filter is also called microfilter for the fact that it comes with the tiny pores of the micro dimensions. It filters the extracted coffee grounds from the liquid coffee. In fact, it eliminates the sediments to the level, you won’t find the coffee grit in the end. Additionally, the paper with its absorbing properties will take out the oily extracts of the coffee grounds. Hence, it will avoid the acidic taste of the coffee. - Metal Filter
The counterpart of the paper filter is the metal filter mostly made of stainless steel material. This filter is useful for avoiding the use of frequent changing of the paper filter. Also, the metal filter will allow the coffee to have the oily extracts and the acidity.
4. Accessories
You will get these accessories when you purchase the Aeropress along with the tote carry bag at the cheapest rate possible. These accessories are the must-have tools while making the coffee using the Aeropress coffee maker.
- Stirrer
Brewing chamber of the Aeropress is narrow but long. Moreover, the spoons, knives rarely work for stirring the coffee-water mixture. Hence, here is the BPA free plastic stirrer with the wide handle for gripping. - Funnel
Adding the coffee grounds in the Aeropress brewing chamber would not have been easier. The wide funnel helps you to out coffee grounds in the brewing chamber right from the grinding vessel or other containers. - Scoop
Lastly, the coffee scoop helps you to maintain the proportion of grounds you use for brewing the espresso shots, Aeropress latte or cappuccino.
Methods of Brewing Aeropress Coffee
As we mentioned earlier, there are two methods of brewing coffee in the Aeropress coffee maker. Namely, these methods are called the standard brewing method and the inverted brewing method.
Moreover, these methods are not technically different because, in the end, the coffee and water infusion and extraction happens in a similar way. But the arrangement of the apparatus of the coffee maker will have a different position.
A) Standard
Here are the Aeropress coffee maker review and a step by step process for brewing espresso using the standard method. In this method, brewing takes place by keeping the apparatus in an upright position. You have to place the Aeropress coffee maker over the coffee mug or serving kettle. The opening end of the filter cap should sit on the coffee mug such that it pour the coffee mug.
1. Collect the Apparatus
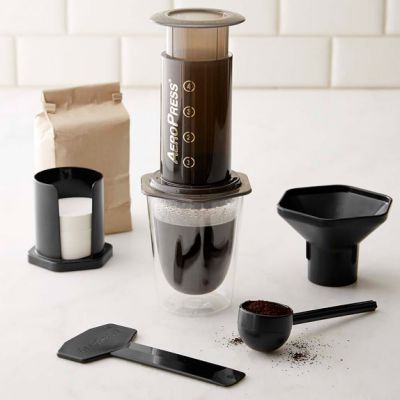
You need to collect all the components of the Aeropress coffee maker showed in the image above. Along with that, you will need the hot water, coffee grounds, and coffee mug. Not to mention, you should perfectly wash and dry the apparatus to have the best Aeropress coffee.
2. Dampen the Filter Paper Placing It in the Cap
Place the paper filter in the filter cap and pour a little water to stick the paper in the filter cap. On the other hand, if you use the metal filter then dampening the filter will be unnecessary.
Because the paper filter will tend to dislocate from its position if you keep it in the dry state. Also, the filtration process will lag and some of the necessary coffee elements will clog in the filter. Whereas, the metal filter will get stuck in the filter cap and filter the coffee consistently.
3. Attach the Filter Cap on the Brewing Chamber
Then, attach the filter cap on the Aeropress coffee maker(assembled with all the components). Remember, tightly twist the filter cap to avoid the accidental possibility of a leak. Moreover, the Aeropress filter cap can leak if you don’t secure it tightly.
4. Pick a Coffee Mug or Kettle
Thereafter, you shall take the coffee mug or the coffee serving kettle which has a wide mouth. Generally, the mouth of the coffee mug/kettle should be wider than the size filter cap. Therefore, the coffee serving vessel can easily accommodate the filter cap on its mouth. In fact, it will prevent the coffee from spilling.
5. Place the Brewing Chamber on the Mug
Lastly, place the Aeropress coffee maker on the coffee mug. Here, arranging the apparatus comes to an end.
6. Add Coffee Grounds & Water in the Brewing Chamber
Now, you have to grind the coffee beans to a fine level which is slightly finer than the common salt and add in the brewing chamber. Generally, 15 to 16 grams of coffee grounds will be enough for a shot. You can use the funnel for this purpose.
Thereafter, add water in the chamber. Try to maintain ten times the water volume than the coffee grounds if you don’t have a weighing scale.
7. Stir the Mixture and Let It Sit
Gently stir the coffee-water mixture to accelerate infusion and let it steep for half a minute.
8. Put the Plunger End in the Brewing Chamber
Lastly, place the plunger in the brewing chamber to proceed with extracting the coffee grounds. Now, an air-tight seal is created in the brew chamber
9. Apply Uniform Pressure for Better Extraction
Use the push handle to force the plunger inside of the brewing chamber. It will force the infused coffee out and the filter will keep the grit and grounds inside.
B) Inverted
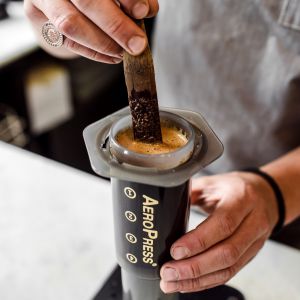
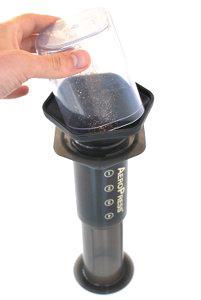
Inverted brewing is another method to brew the coffee using Aeropress coffee maker. The inverted method starts with adding the coffee in the brewing chamber which is in an upside-down position.
However, you will have to flip the Aeropress coffee maker in the upright stance while pouring the coffee/pushing the plunger.
1. Preparing the Apparatus
Follow the same procedure, as you have read in the standard Aeropress coffee brewing method.
2. Place the Plunger in Slightly Inside the Brewing Chamber
In the inverted method, you need to start with placing the plunger inside of the brewing chamber(near the top end).
3. Place the Push-Handle on the Firm Base
Then, put the push handle of the plunger on a firm base. It will get the other end at the top(where the filter cap is fastened).
4. Add Coffee Grounds in the Brewing Chamber
Grind coffee grounds or use the pre-ground coffee, add it in the brewing chamber. Now the grounds are on the plunger-head
5. Pour Water in the Brewing Chamber
Pour water keeping the similar coffee-water proportion as described in the standard Aeropress brewing method.
6. Stirr the Mixture
Gently stir the water-coffee mixture to decrease the infusion time and let it sit for 30 seconds.
7. Dampen the Filter Paper in the Filter Cap
Again, dampen the paper filter keeping it inside the filter cap. Otherwise, use the metal filter.
8. Attach the Filter Cap on the Brewing Chamber
Thereafter, you can fasten the filter cap on the brewing chamber i.e. apparently facing upwards.
9. Place the Coffee Mug or Serving Kettle on the Filter Cap
Finally, place the coffee mug/kettle with its mouth covering the filter cap totally. Hence, both the Aeropress and coffee mug appears in the upside-down position.
And flip the whole arrangement holding both Aeropress coffee maker and coffee mug in different hands. Remember, do not take the mouth of the coffee mug away from the filter cap while flipping. Lastly, push the plunger to get the coffee in the mug or serving kettle.
THE ENDNOTE
Espresso is the brewing method which uses a pressurized flow of hot water through the tightly packed coffee grounds. In the same manner, the Aeropress coffee maker does the same. There is a slight difference between the exact espresso and Aeropress and a lot of difference in their tastes.

Leave a Reply